Rendering Painted Models

One of the things I want my game to support is premium models purchased from excellent indie sculptors who are currently targeting the 3d printing crowd. The current Tabletop Simulator ecosystem of pirated models with crappy textures ripped from video games is not only technically illegal (though I suspect Games Workshop ends up gaining sales here on net), but they really look bad in-game. Tabletop wargames, for me, have always had a significant aesthetic component and it’s a shame that the current digital platforms all drop the ball here. I suspect that many indie sculptors will be eager to open new revenue streams selling professionally textured instances of their sculpts and that players will be fairly happy to drop in a model which is a space marine analog that looks amazing instead of using a model which is technically more accurately shaped but looks ugly.
So to support this, I needed to take a shallow dive into the world of 3d modeling, texturing, and asset creation. If we have an STL intended for 3d printing, how do we turn that into a good looking asset in game? The process ended up being a lot more complicated than I thought, and I’ll end up explaining some of the mathematical goings-on of 3d graphics as I describe the journey.
Polygons
3d models are pretty much universally represented using triangles, referred to as “polys” in most contexts. Formats such as STL or OBJ contain long series of triplets of X,Y,Z coordinates indicating where the corner of each triangle is in 3d space. Generally, the “direction” of the triangle, i.e. which side is the “outside” of the model, is represented by the winding of the coordinates - the coordinates are assumed to be presented in a clockwise order and then the right-hand-rule gives you the direction. The vector which points in this direction and which is orthogonal to the surface of the triangle is called the “normal” vector for the polygon.
When you play a game and a scene needs to be rendered, the goal is to figure out what color each pixel on the screen needs to be. While modern games are starting to use ray-tracing to produce even fancier graphics, traditionally the process has been to load the polygon data of everything in the scene and also a bunch of textures into the graphics card, and then massively, in parallel, for each triangle, figure out which that individual triangle would draw to the screen.
So one big limiting factor of performance is how many polygons we’re going to try to render. Depending on engine and graphics card, it can be feasible to draw between 1 million and 11 million polygons per scene with good performance. I want my game to run on lower-end hardware so I see 1 million as a hard cap.
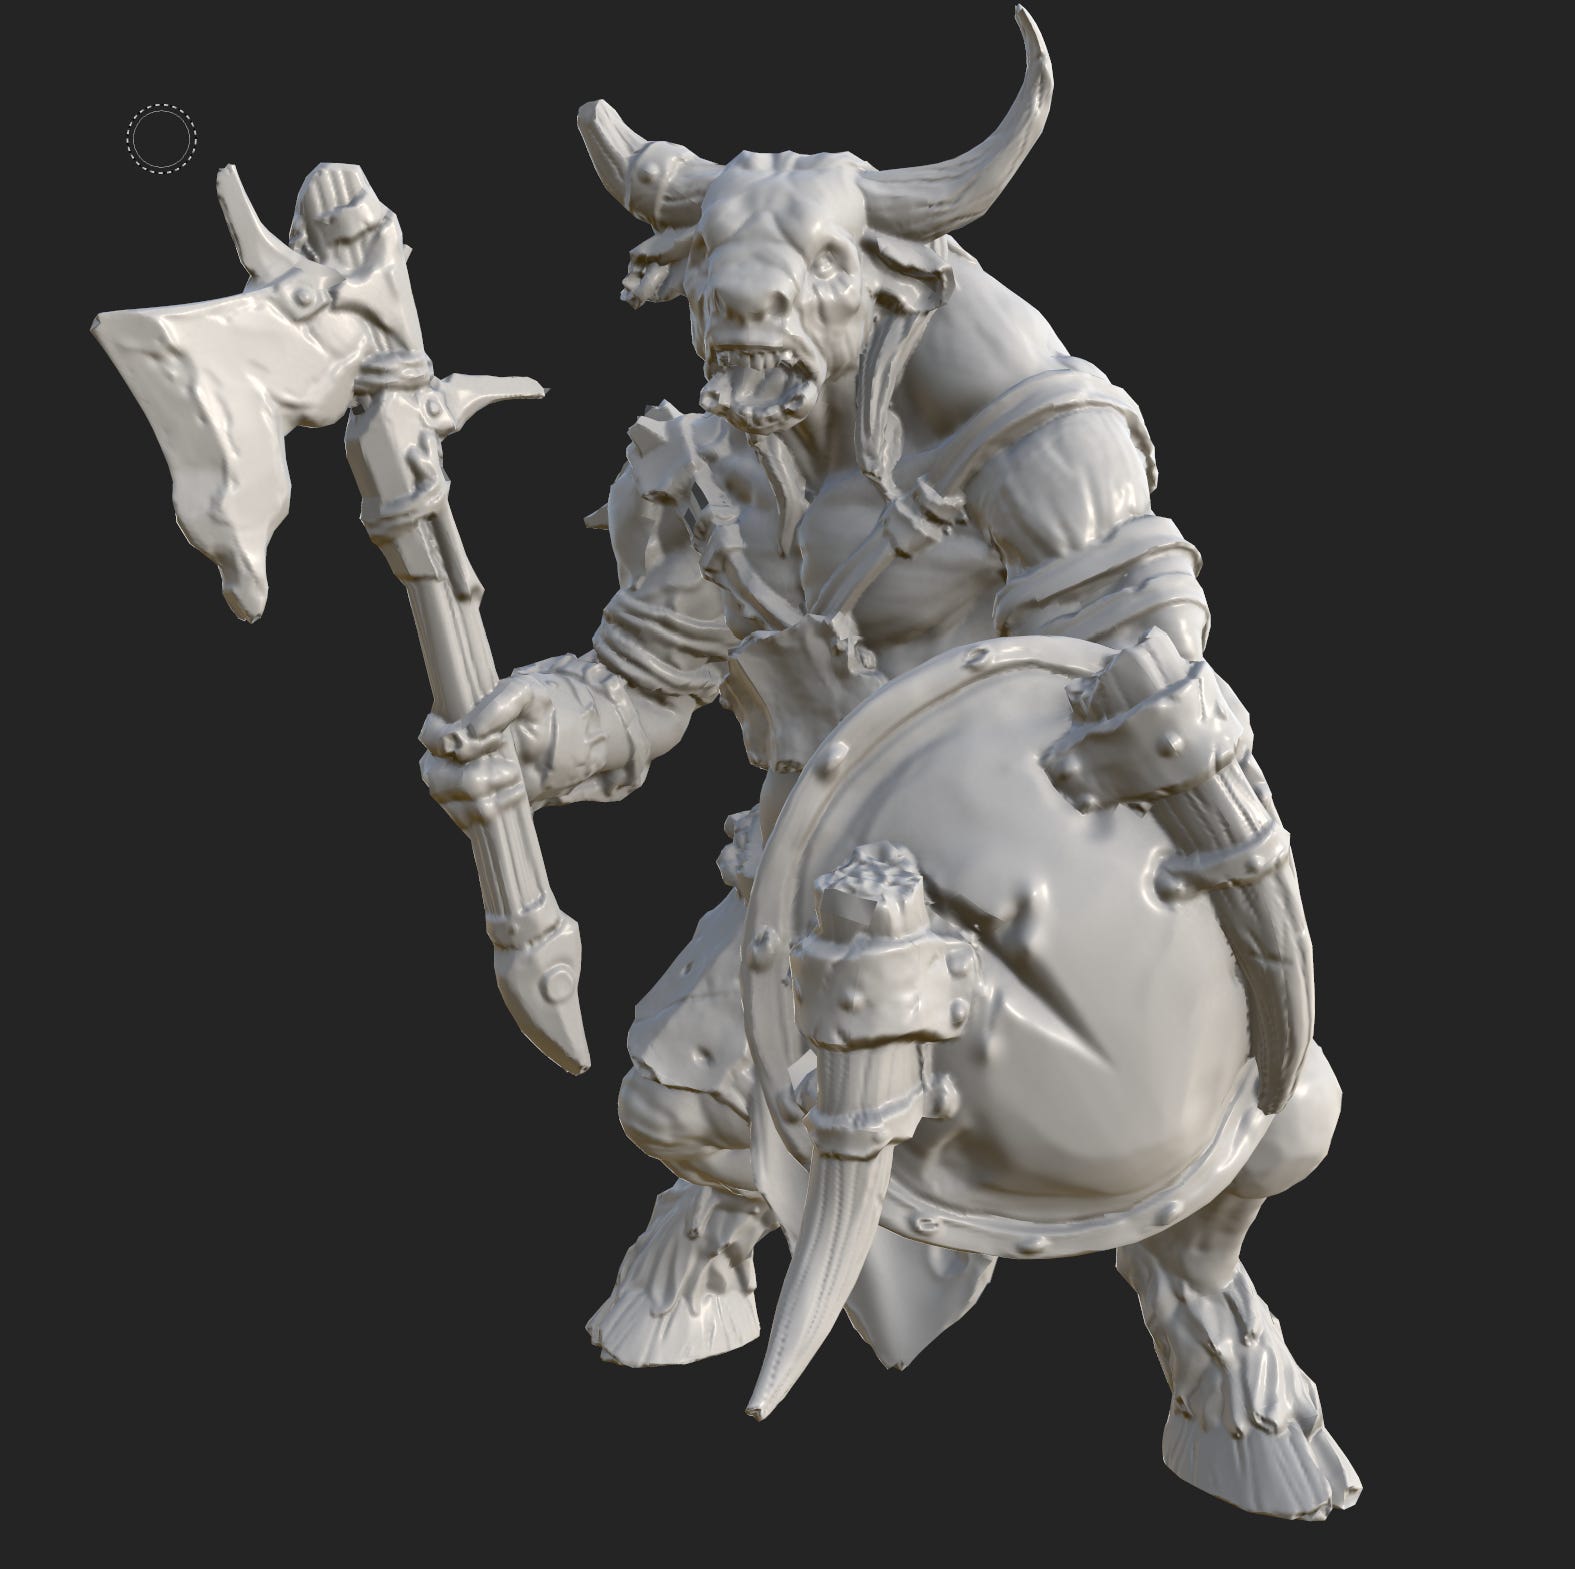
We’ll be following the journey of this lovely Capra Raider model from Beastarium Miniatures
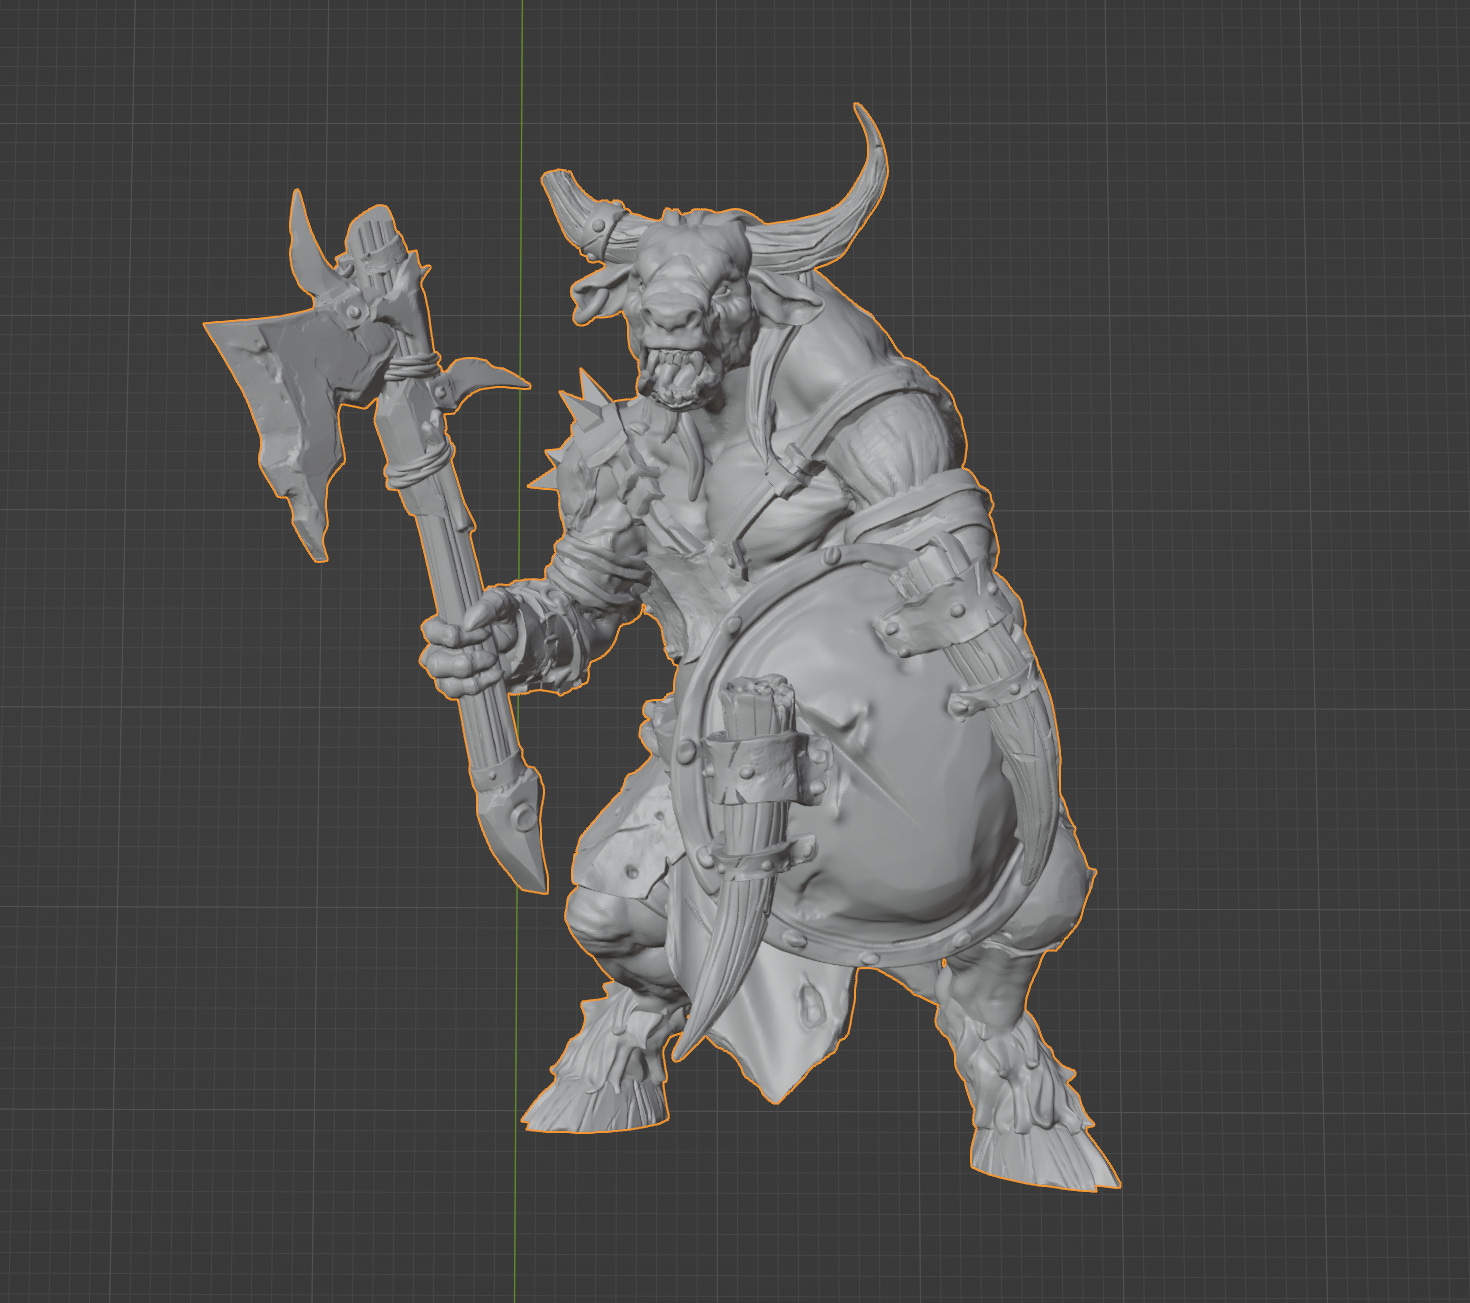
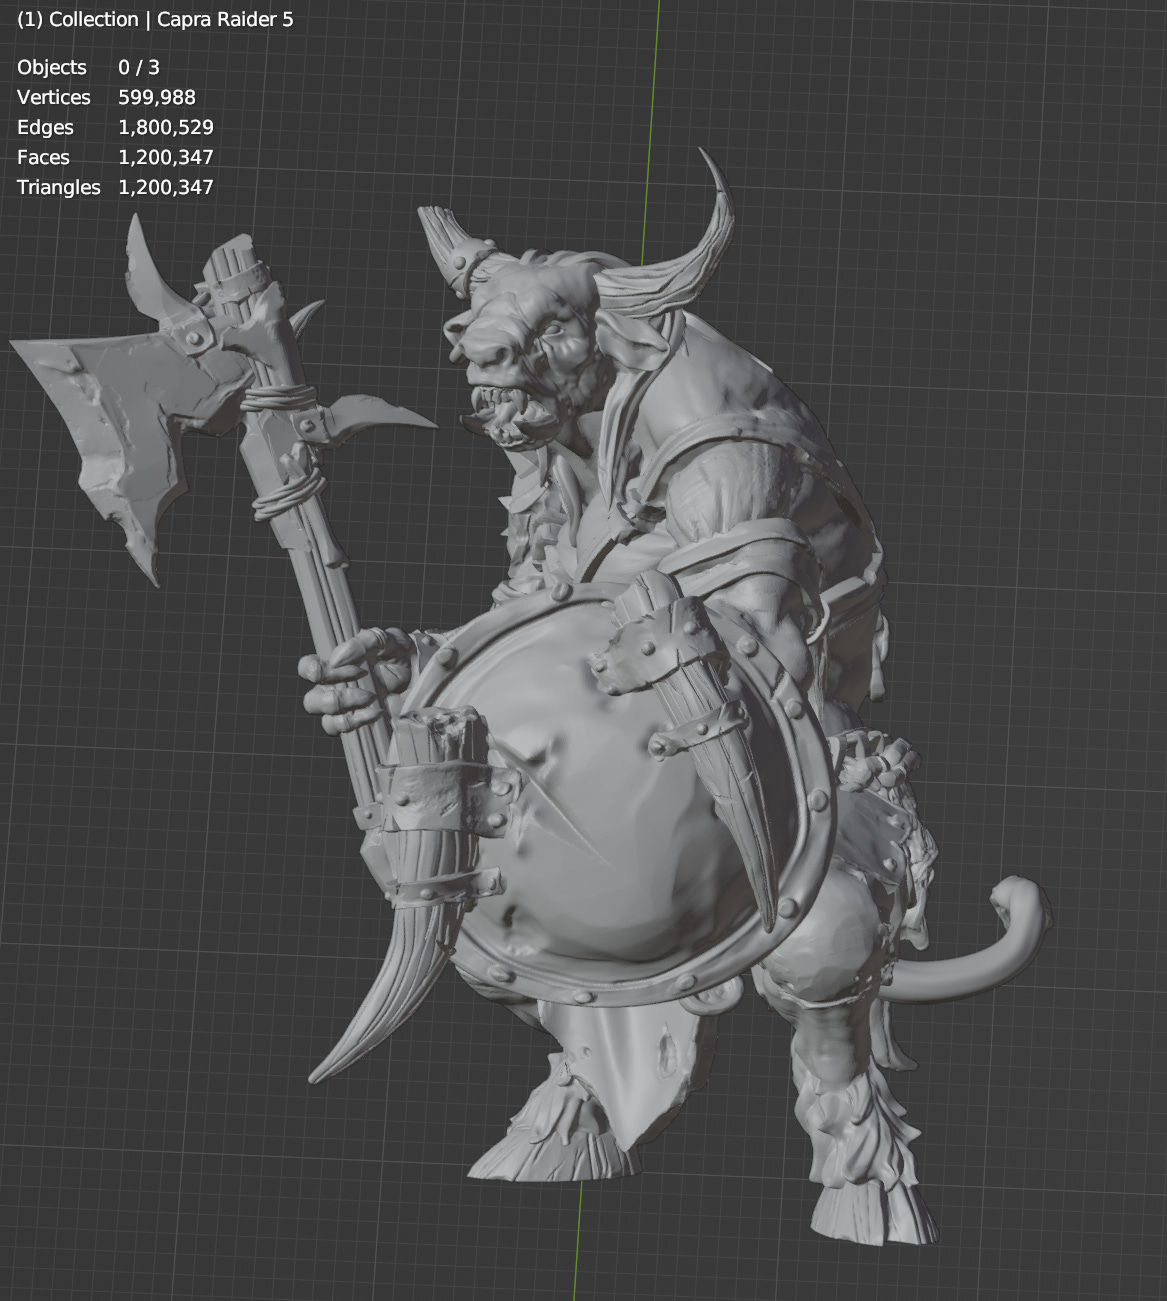
This is the raw STL, intended for 3d printing, imported directly into Blender. This model has 1.2 million polygons all by itself!
It looks awesome and is super detailed but we can’t possibly render this and also render other stuff. So how do we reduce the count? How do modern games look so good if they can “only” handle 5 million polygons? The secret is “normal maps”
What is Normal, Really?
So remember the “normal” of a triangle is the vector pointing directly away from the surface. In the pictures above, Blender is showing us a shaded version of the model which uses these normals to figure out how bright each polygon should be.
As a basic intuition for shading, imagine a piece of metal held facing towards the sky on a bright day - the metal is going to reflect the sun and be super bright. Face it downwards, and it’ll be much darker, reflecting the ground. Color in general works this way, and so Blender can show us the shape of the model by coloring surfaces more brightly the more “up” they face.
But remember the graphics card is operating on each pixel, and basically every pixel falls in the middle of a polygon. What if, when doing our calculations, we didn’t use the normal of the underlying triangle, but some other normal?
A “Normal Map” is this - each triangle maps to a two-dimensional portion of some “texture”, which is in practice a big image. When we want the normal for some portion of a triangle, we look it up in the image and use the value we find there, rather than using the actual normal of the triangle.
Low Poly Mesh and UV Unwrap
So the first step is create a version of the mesh which is much lower polygon. Here I used ZBrush’s ZRemesher to reduce the polygon count while preserving “creases” as much as possible so that sharp edges don’t lose definition
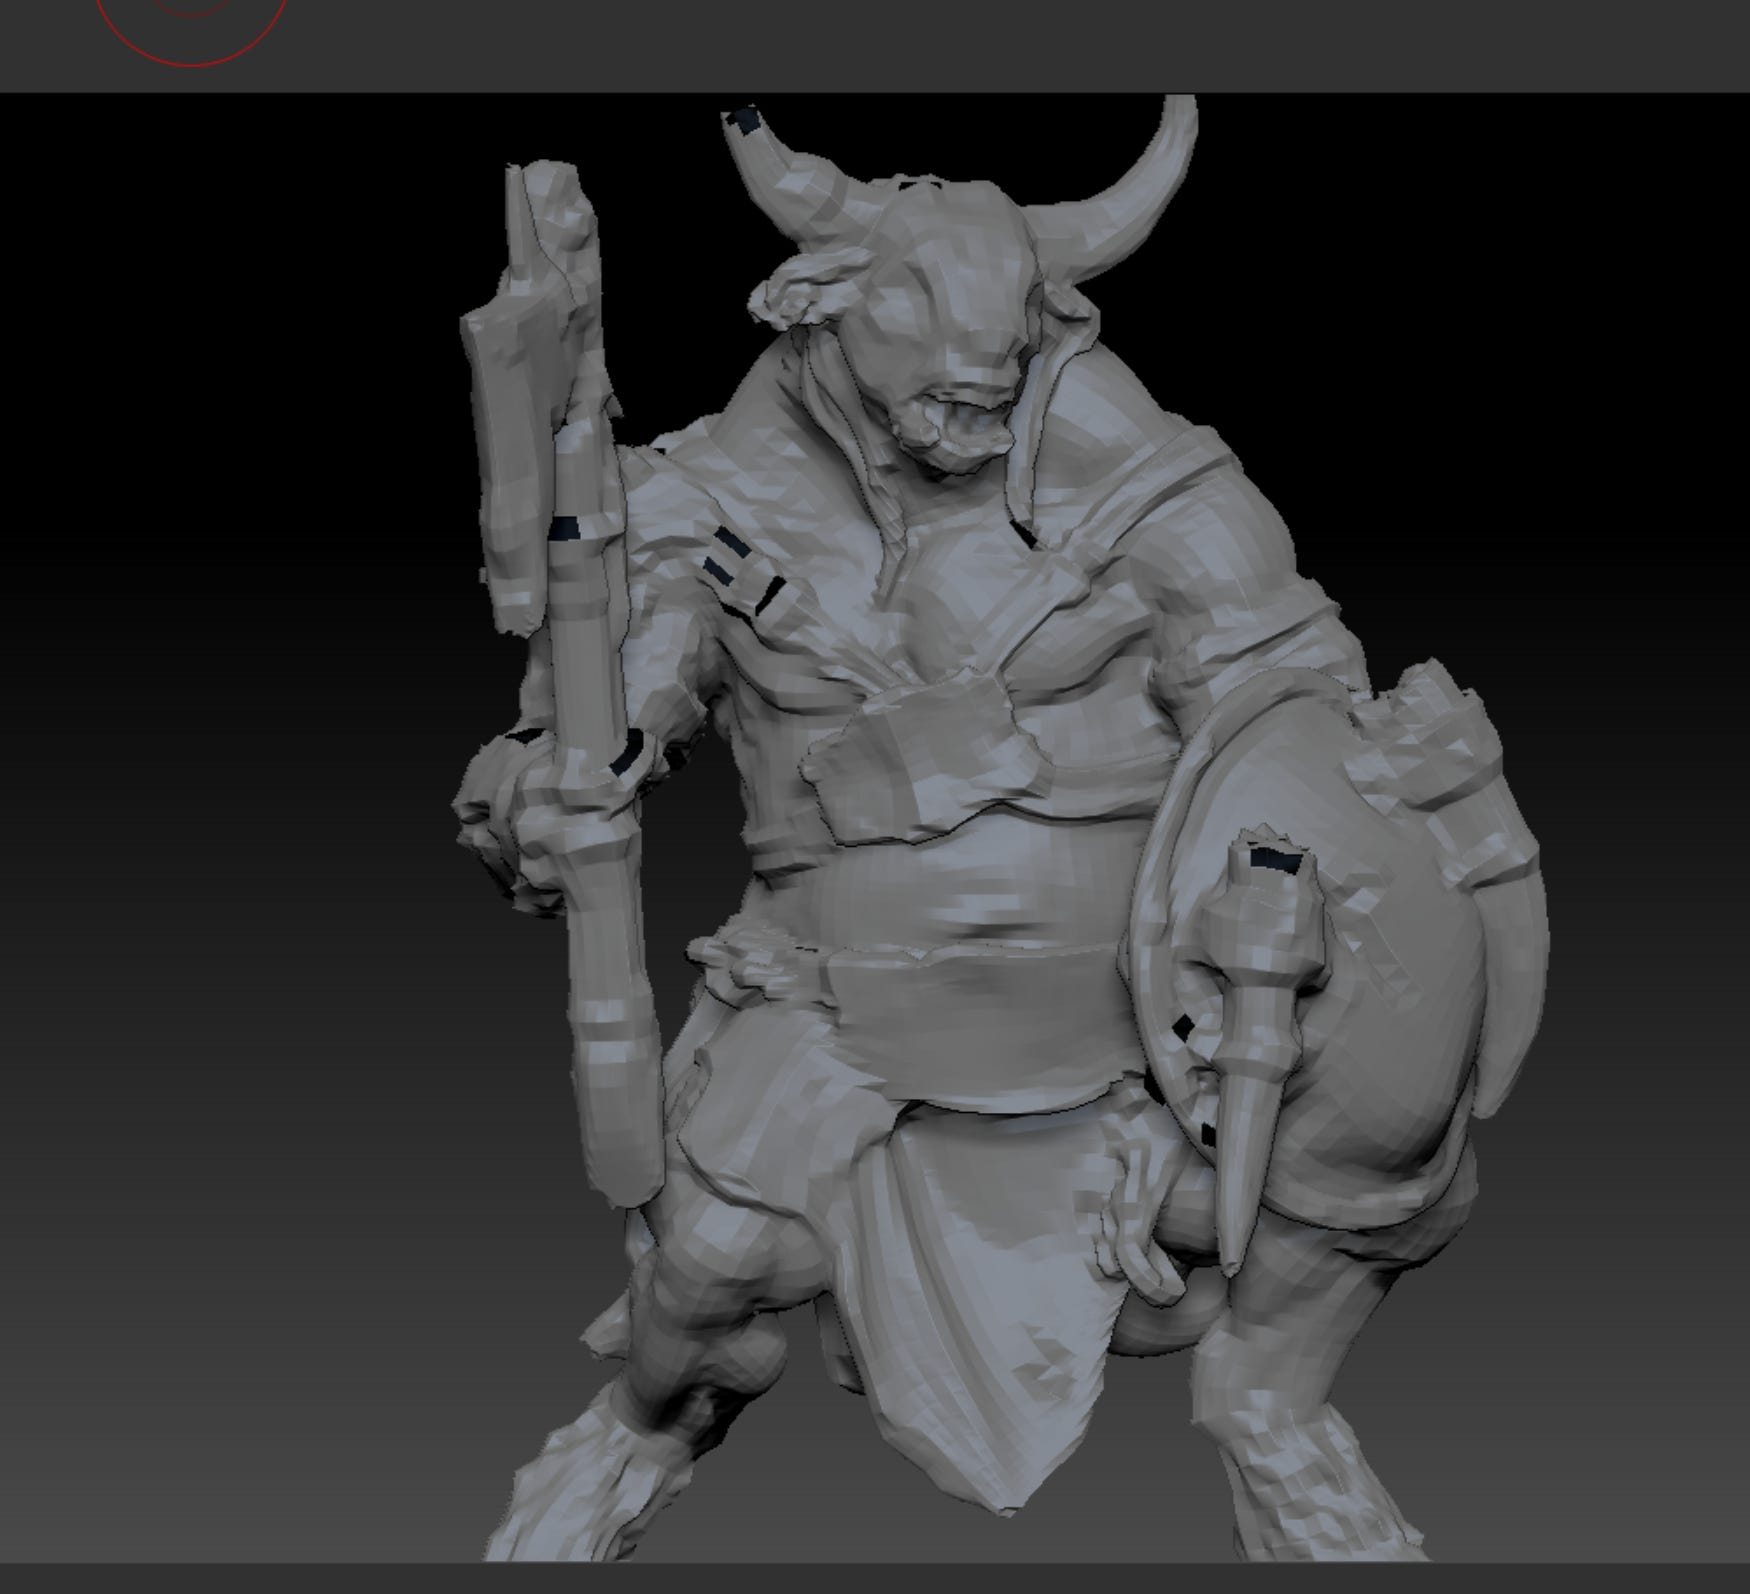
This model has ~20k polygons. As you can see it is very ugly.
Using this model, we need create the mapping from the 3d surface to 2d texture lookup locations. This is called “UV Unwrapping” and is something professional 3d modelers spend a lot of time doing correctly. They have to worry about animation and distortion and a million other factors. I’m just trying this out, and my models won’t be animated, so I just hit the fully-automatic button and hoped for the best.
That works I guess? Seems zany but who am I to judge.
So now that have the low poly model and an unwrapping, we can bring this over into Adobe Substance Painter
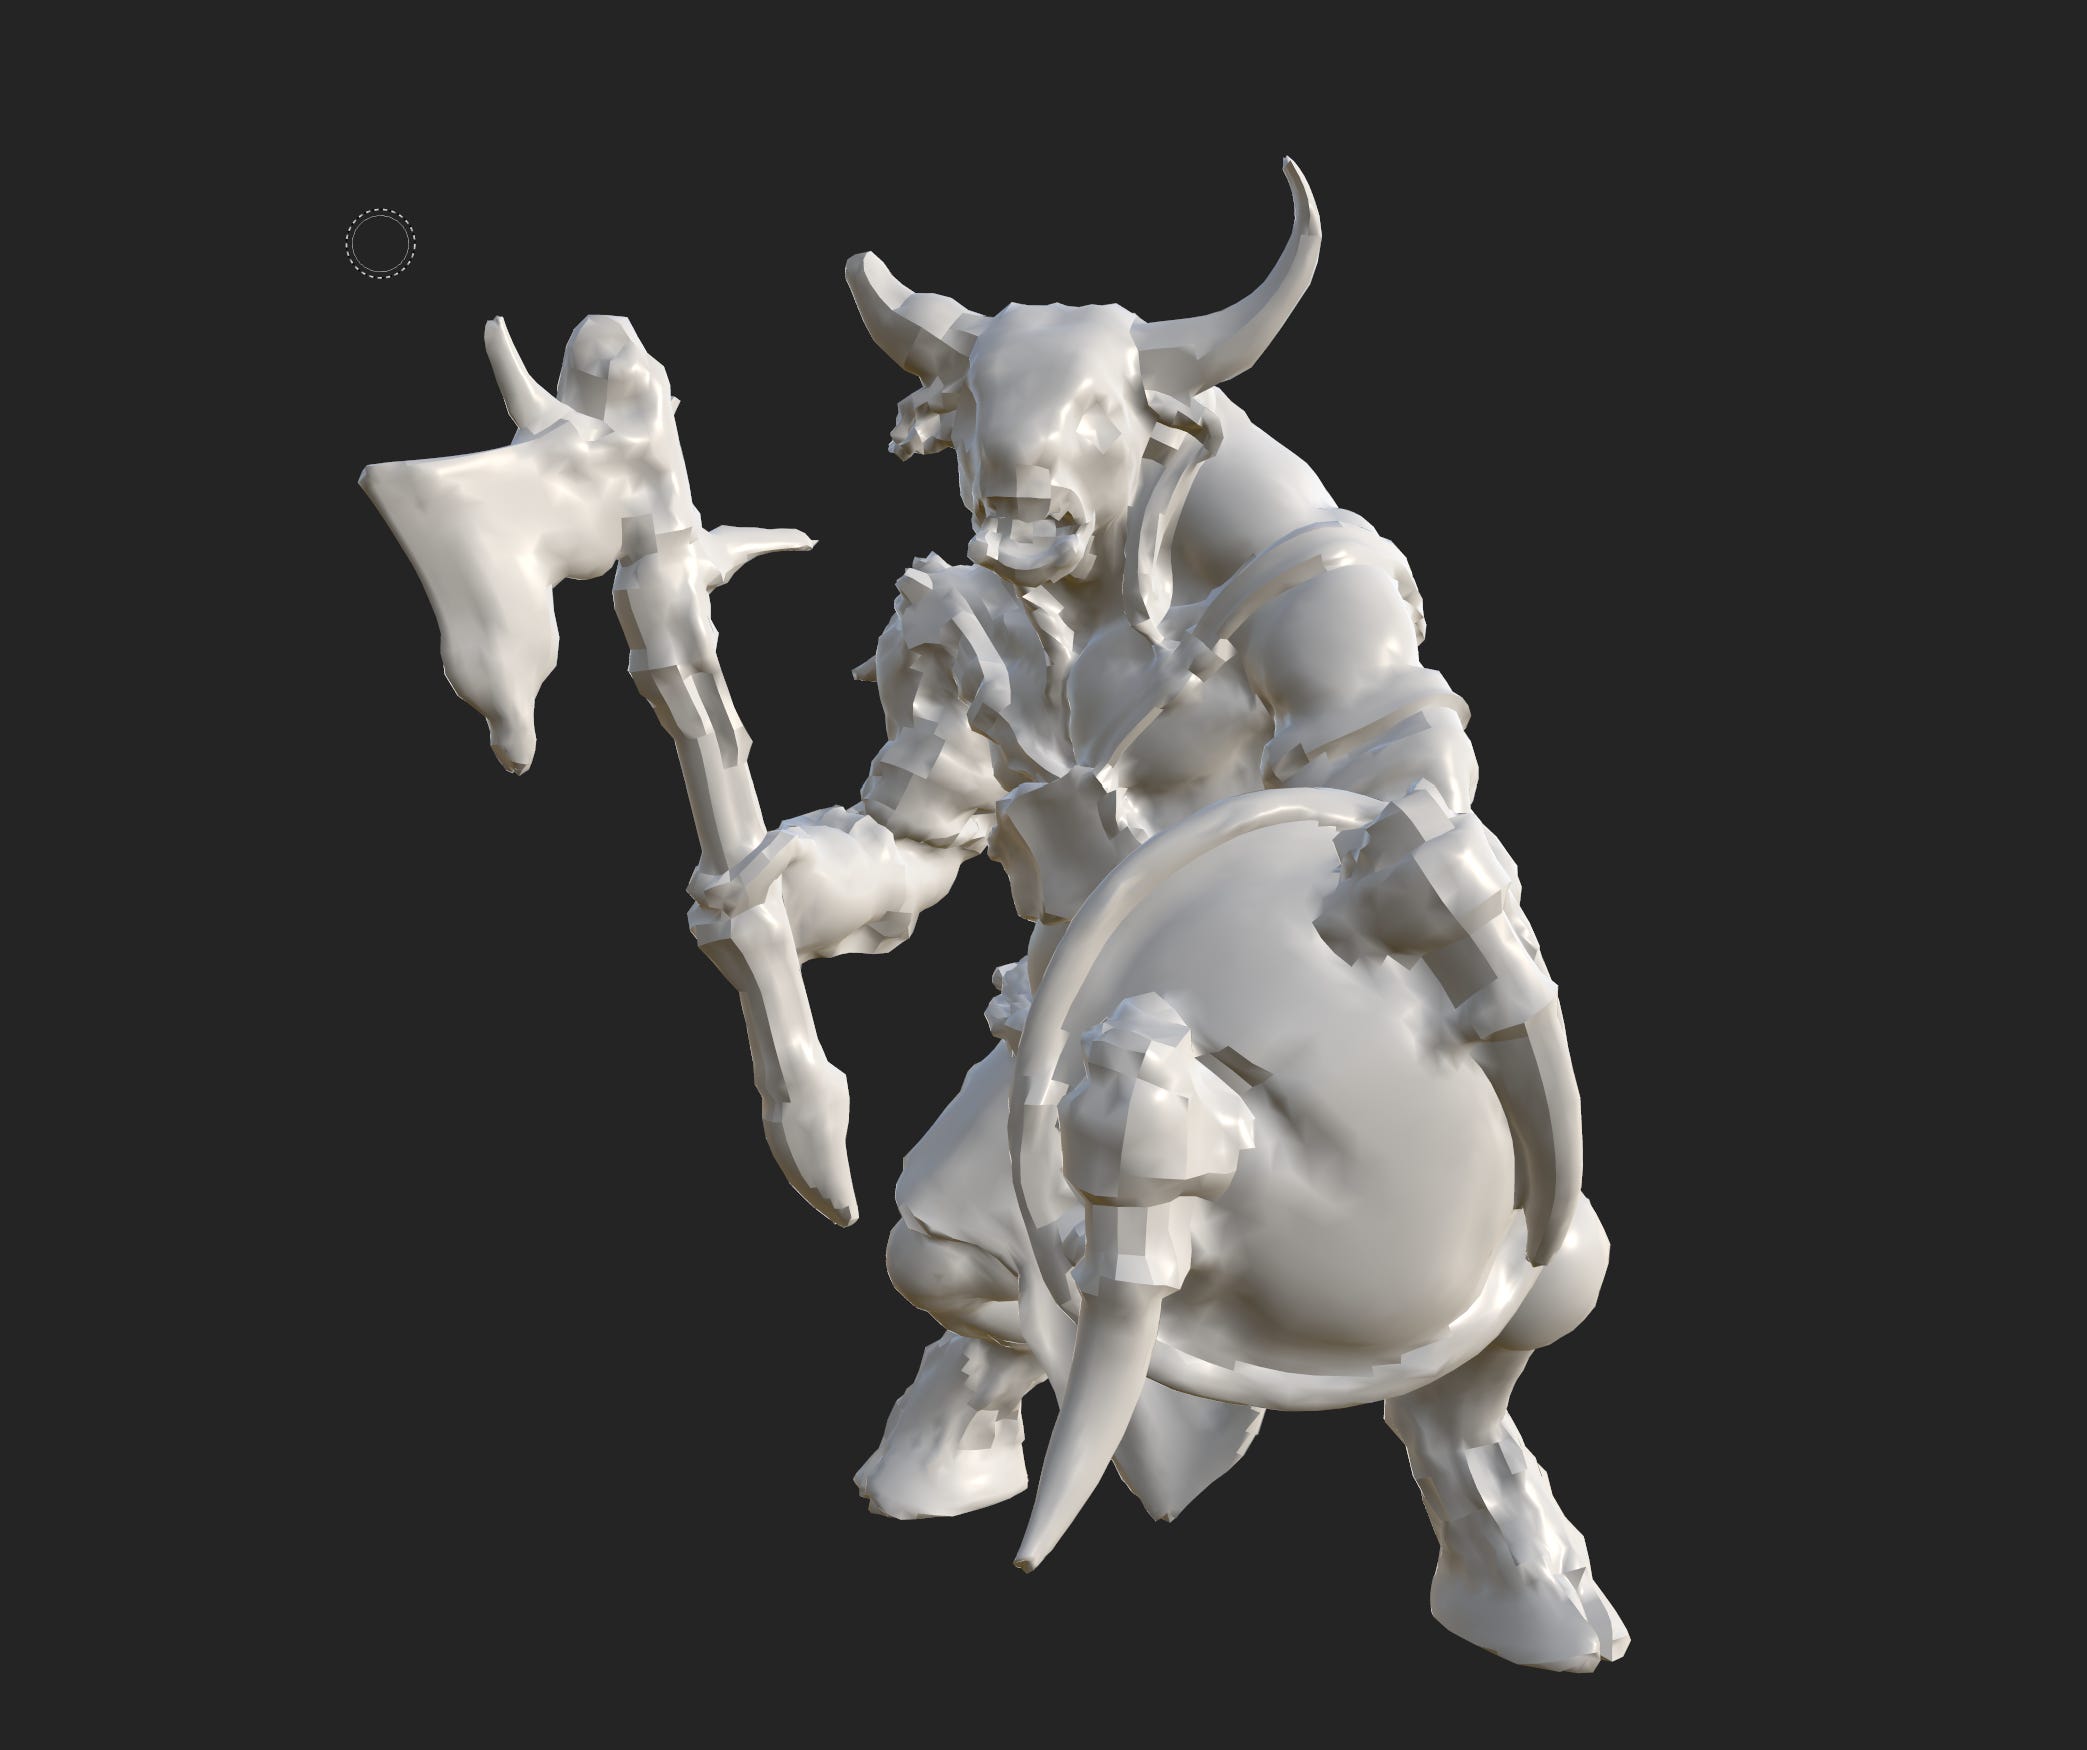
If we then tell substance painter to compute the normal map for us using the high-poly mesh, what it’s going to do is essentially shoot a bunch of rays through the high-poly mesh, see where they hit the low-poly mesh, and copy the “real” normal from the detailed mesh into the lookup table for the low-poly mesh to use when using “fake” normals for shading.
Same program, same mesh, effectively the same computation needed, drastically different result. If you look carefully, you will see some places where this approach costs some detail - the axe in particular has a sharp edge in the original sculpt which is not perfectly preserved here.
Painting
So from here I used Substance Painter for it’s intended purpose and painted onto the model. This is all just for testing so I spent maybe 20 minutes applying colors, using blur filters to cover up my amateur work, and making some surfaces metallic for cool reflections. Here was the result:
Notice how the specular highlight on the shield moves around as I move the camera - this is another part of standard graphics pipeline designed specifically to render high-reflection materials which accounts for the angle of lights and cameras in the scene.
So this looks great! Let’s get it into the game:
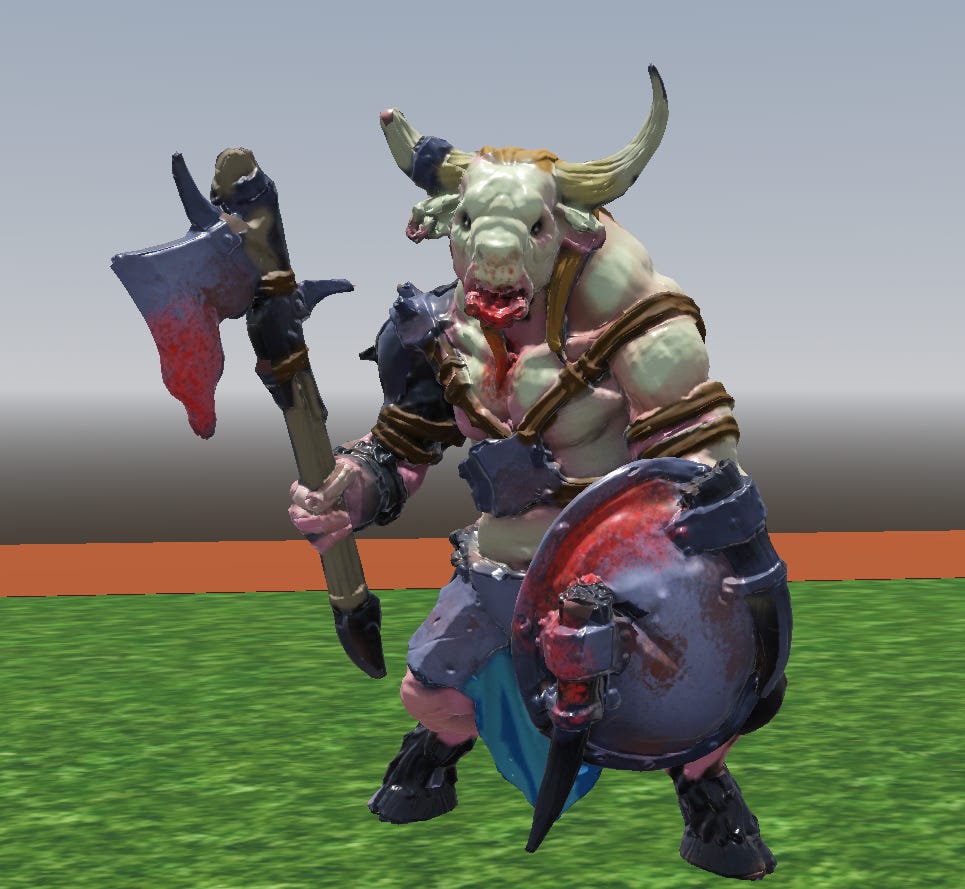
Oh wow… it’s fine I guess? It looked a lot better in Substance Painter. What’s going on here?
Why Miniature Painters Prefer Matte Paint
Miniatures are, as the name implies, much smaller than the thing they represent. It has long been known in the miniature painting community that when you paint model, your goal is to paint the effect of lights on what you’re trying to represent. Your job is essentially to do the same thing the graphics pipeline does - figure out what the final color of each spot on the model should be after accounting for lights and shadows and colors and metals etc. But crucially, you want to mimic the lights as they would be on the large version of your subject. Differences on the small model will be small, but differences on an 8 foot tall super soldier would be very pronounced!
Miniature painters use matte paint, which has as little reflection as possible, so that they have absolute control over where each highlight and shadow ends up. We don’t want any additional simulation, we don’t want a highlight to move around with the camera, we want exactly what we imagined fixed perfectly onto the model. Can we do something like this for the model in the video game?
It turns out we can! It’s called “Baked Lighting”. For most games this is an optimization which makes the game look worse, because various parts of the scenery will stop rendering differently at different angles and with different lighting. In a tabletop game, that’s actually exactly what we want!
If we ask Substance Painter to bake the lighting, it actually replaces the normal map, metallicity maps, occlusion maps etc. and we can use a single texture which is just the color we want. We tell Godot to use “unshaded” mode so that it doesn’t try to mess with our baked in results.
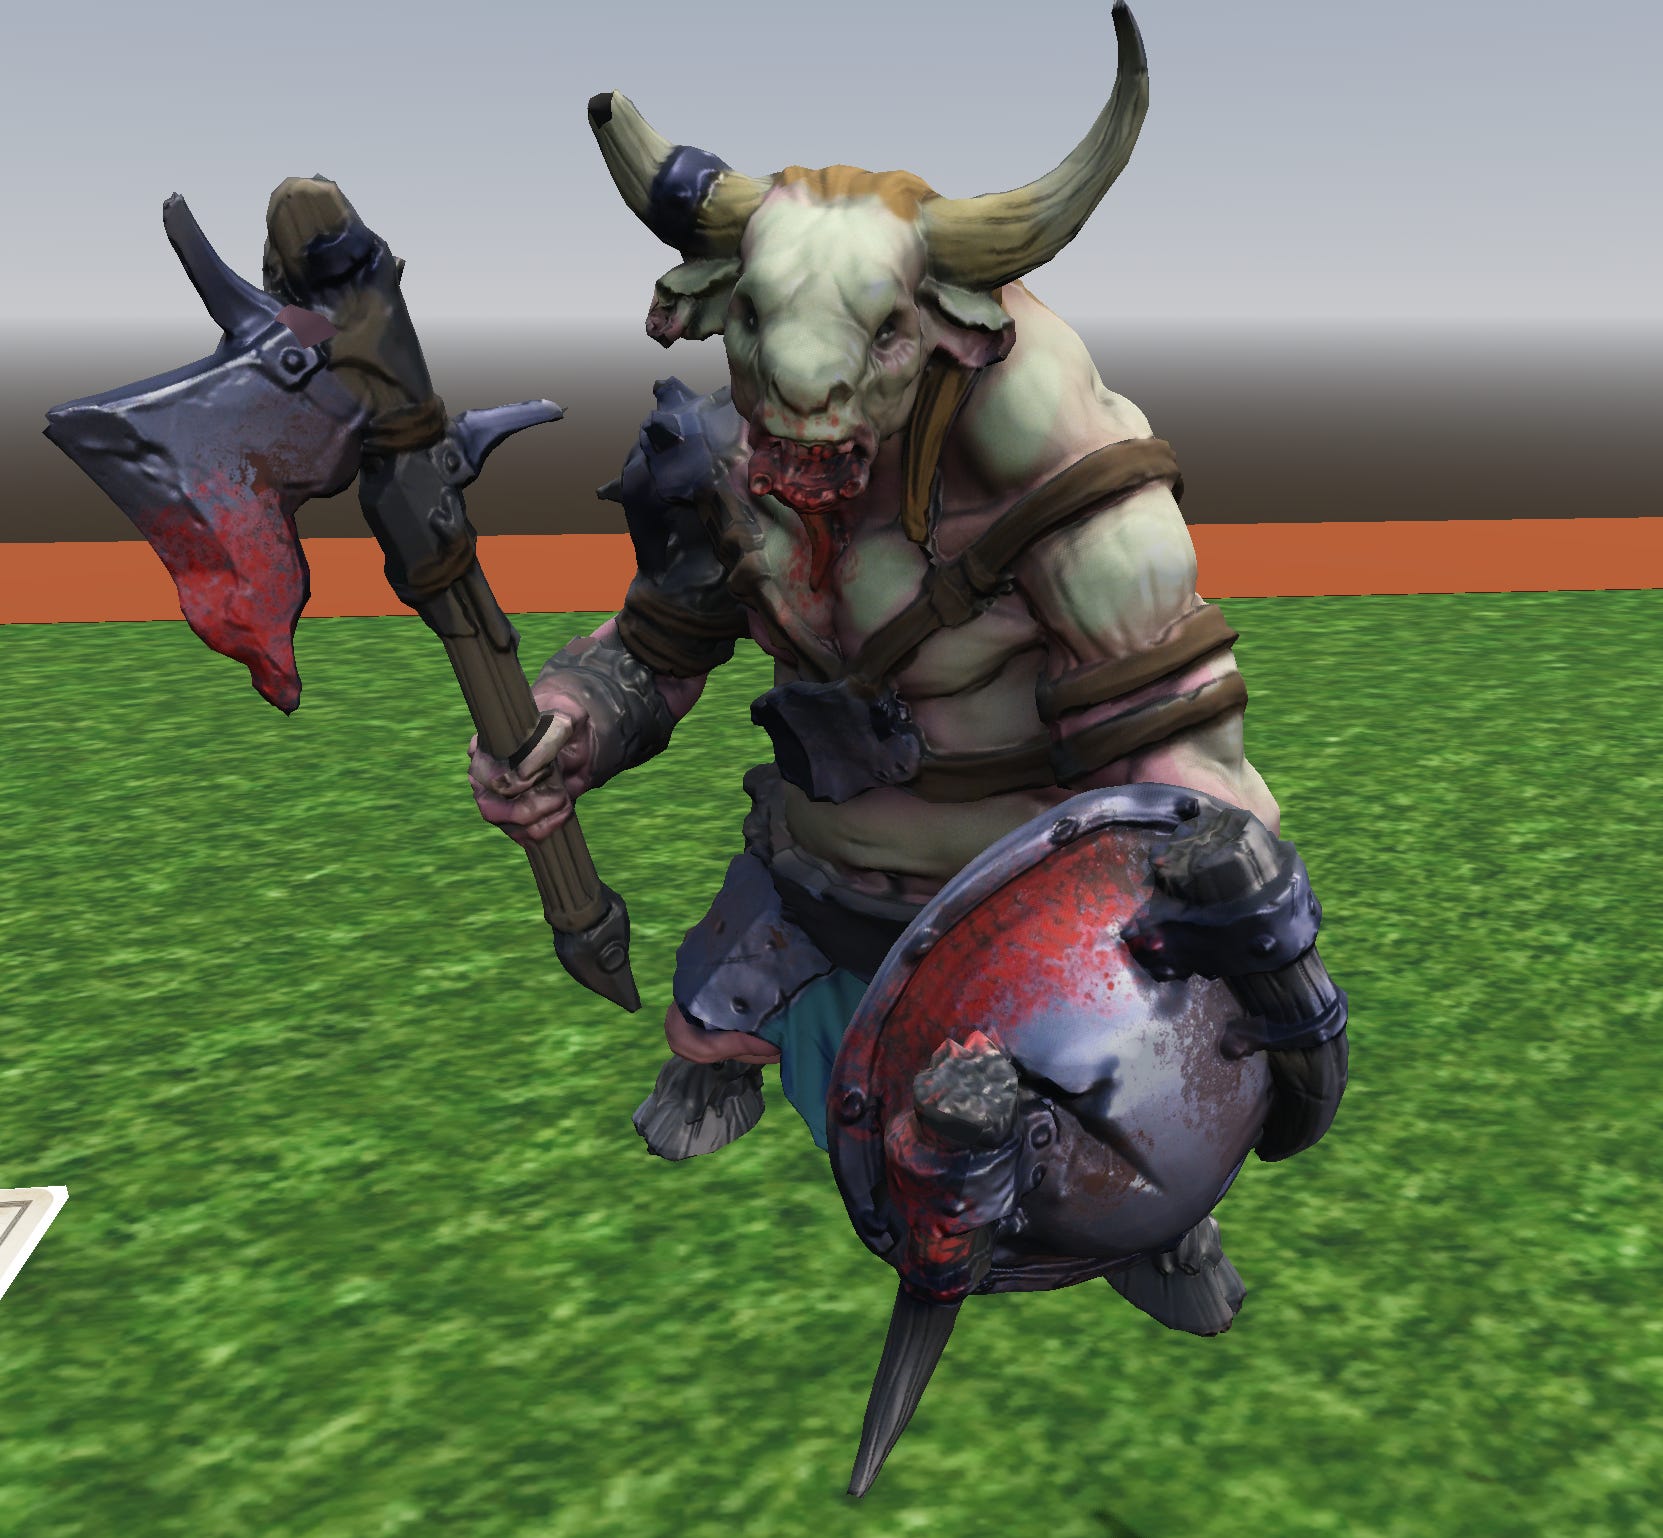
Much better! and the quality will increase with more time spent on the paint job and materials.